Early in my Angular journey, I ran into what felt like a simple problem:
“I just need to access an HTML element and read its properties.”
It sounded straightforward. It wasn’t.
⚠️ The Situation
I needed to:
Access a DOM element from my template
Read values like height/width
Use that information in my logic
So I wrote:
ngOnInit() {
console.log(this.myElement.nativeElement);
}
And…
👉 It returned undefined.
🤦 The “Working” Fix
After some trial and error, I found a workaround:
ngOnInit() {
setTimeout(() => {
console.log(this.myElement.nativeElement);
});
}
And just like that:
The element was available ✅
The logic worked ✅
It felt like a clever fix.
But it wasn’t.
🧠 What Was Actually Happening
Angular hadn’t finished rendering the view when ngOnInit executed.
So while the component was initialized,
the DOM was not yet ready.
By wrapping the code in setTimeout, I was:
Delaying execution to the next event loop
Giving Angular enough time to render the view
👉 I didn’t fix the problem
👉 I just waited long enough to avoid it
💥 The Real Issue
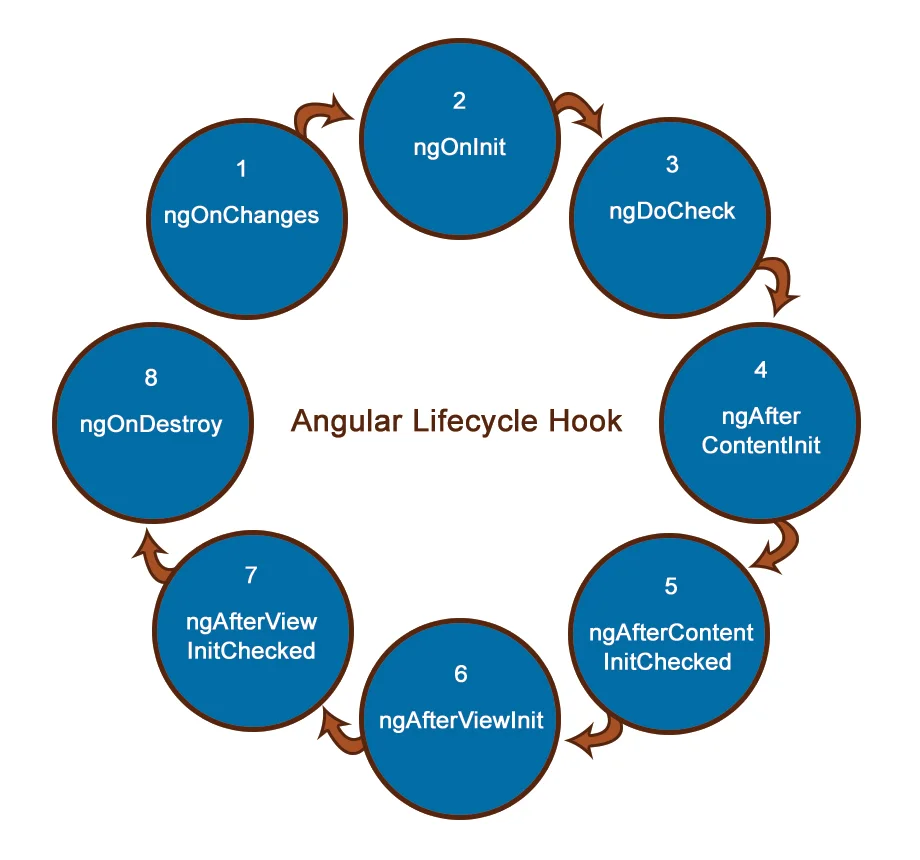
I was using the wrong lifecycle hook.
Angular lifecycle hooks exist for a reason:
ngOnInit
→ Component is initialized
❌ DOM is not guaranteed
ngAfterViewInit
→ View (and DOM) is fully initialized ✅
✅ The Correct Approach
The proper fix was simple:
ngAfterViewInit() {
console.log(this.myElement.nativeElement);
}
Now:
The element is always available
No hacks or delays
Predictable behavior
🔍 Accessing DOM the Right Way
Use @ViewChild to reference elements:
@ViewChild('myElement') myElement!: ElementRef;
Template:
<div #myElement></div>
This ensures Angular properly tracks and provides access to the element.
⚠️ Why setTimeout Is the Wrong Approach
While it may “work,” it introduces:
Hidden timing dependencies
Fragile and unpredictable behavior
Difficult debugging scenarios
Poor code clarity
More importantly:
It hides a misunderstanding of how Angular works.
📚 Key Takeaways
1. Lifecycle awareness is essential
Knowing when things are available is critical in Angular.
2. Avoid timing hacks
If something requires setTimeout to work, revisit the approach.
3. DOM access has a defined lifecycle
Use ngAfterViewInit when working with view elements.
That one small mistake — trying to access the DOM too early —
taught me a bigger lesson:
In Angular, timing is part of the architecture.
Understanding lifecycle hooks doesn’t just fix bugs —
it helps you write code that scales, behaves predictably, and is easier to maintain.
If you’ve ever used setTimeout to “fix” something in Angular,
you’re not alone.
But the real upgrade happens when you stop patching symptoms
and start understanding the system.